 Semiahmoo Siding
 Siding Installation in Custer: What Local Homes Are Up Against
Custer sits close enough to the water that salt air is a fact of life, not an occasional nuisance. Add Whatcom County's driving winter rain and a moss season that can stretch from fall through spring, and you have a climate that is genuinely hard on exterior siding. Salt-laden air accelerates corrosion on fasteners and trim metal. Wind-driven rain doesn't just fall straight down — it gets pushed sideways into laps, corners, and penetrations that a fair-weather installation might get away with ignoring. And moss doesn't just look bad; it holds moisture against the siding surface for months at a time, which is exactly the condition that rots wood-based products and stresses paint film on lesser materials.
None of this means siding is doomed in Custer. It means the installation has to be done with this specific climate in mind — correct water management, the right fastening approach, and a product that can actually take the punishment without needing constant upkeep.
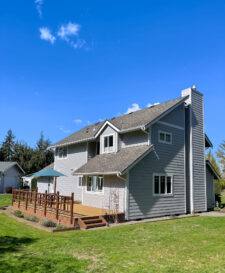
What Correct Siding Installation Actually Involves
Siding is a system, not just a decorative skin. The visible boards or panels are the last layer of a chain that starts underneath them. A correct installation gets every layer right, in order:
- Weather-resistive barrier (WRB): A continuous, properly lapped house wrap or building paper that sheds water down and out, not into the wall cavity.
- Flashing at every penetration: Windows, doors, hose bibs, light fixtures, and vents all need flashing detailed so water is directed out over the WRB, never trapped behind it.
- Rainscreen or drainage gap where called for: A small airspace behind the siding lets any moisture that does get past the surface drain and dry out instead of sitting against the sheathing.
- Correct fastener type, spacing, and penetration depth: Undriven, overdriven, or wrong-gauge fasteners are one of the most common causes of premature siding failure.
- Manufacturer-specified clearances: Gaps at grade, roof lines, decks, and dissimilar materials so water has somewhere to go and siding doesn't wick moisture from contact with soil, concrete, or roofing.
- Caulking and sealant only where the manufacturer calls for it: Sealing the wrong joints traps water instead of releasing it.
Skip or shortcut any one of these steps and the siding itself almost doesn't matter — even a premium product will fail early if the water management behind it is wrong. In a climate like Custer's, with sustained wind-driven rain and long damp stretches, these details matter more than they would in a drier region.
Why We Install Only James Hardie Fiber Cement Siding
We made a deliberate decision to install one product line: James Hardie fiber cement. We don't offer vinyl, LP SmartSide, cedar, primed spruce, or other fiber cement brands, and that's worth explaining rather than glossing over.
Fiber cement as a material category resists the two things that do the most damage locally — sustained moisture and salt exposure — because it's non-combustible and doesn't rely on an organic wood substrate that can absorb water and swell, rot, or delaminate over time. Within fiber cement, James Hardie's HZ product lines are engineered for specific climate zones, and their ColorPlus factory-applied finish is baked on under controlled conditions rather than field-painted, which means better, more consistent adhesion than a coat applied on-site in variable weather. Hardie backs installations with a strong, transferable limited warranty, which matters to homeowners who plan to sell in the next decade.
That's not a claim that every other product is bad — vinyl is inexpensive, wood has real appeal, and other fiber cement brands have their own engineering. It's that after years of installation work in this climate, Hardie is the product we're willing to put our name behind and warranty our labor against. Standardizing on one system also means our crews install it constantly, rather than switching between products and picking up bad habits from unfamiliar materials.
Our Installation Process, Start to Finish
1. On-site assessment
We look at existing siding condition, sheathing and framing where accessible, drainage patterns around the foundation, and any trouble spots — chronic moss buildup, staining, or soft spots that hint at moisture already in the wall.
2. Tear-off and substrate check
Old siding comes off and we inspect the sheathing underneath. Any rot or water damage gets addressed before anything new goes on — covering a wet wall with new siding just hides the problem.
3. Water management layer
WRB installation, flashing at every window, door, and penetration, and a drainage gap where the wall assembly calls for it.
4. Hardie installation to manufacturer spec
Correct fastener schedule, proper clearances at grade and roof lines, and factory-mitered or properly sealed joints depending on the product line and profile chosen.
5. Trim, corners, and detail work
This is where a lot of installations are won or lost — outside corners, butt joints, and transitions to trim or masonry are the spots most exposed to wind-driven rain.
6. Final walkthrough
We review the finished work with the homeowner, including basic care and what to watch for over the first year or two.
Cost Factors for Custer Siding Installation
Every home is different, but the same variables tend to drive cost up or down. This isn't a quote — it's what to expect the estimate to weigh.
| Factor | Why it matters |
|---|---|
| Tear-off complexity | Multiple layers of old siding or hidden rot add labor before new siding can start |
| Wall square footage and home shape | More corners, dormers, and cutouts mean more trim and detail work per square foot |
| Substrate repair | Rotten sheathing found during tear-off has to be replaced before installation continues |
| Siding profile and accessories | Lap width, trim style, and accent details affect material and labor cost |
| Access and site conditions | Steep grades, tight lot lines, or limited staging area affect crew efficiency |
| Existing moisture damage | Homes with a history of moss and dampness sometimes need extra drainage detailing |
Installation Mistakes We See on Older Custer Homes
When we tear off older siding in this area, certain problems show up often enough to be worth flagging before they cost a homeowner a full re-side:
- Fasteners driven flush or overdriven into fiber cement, crushing the material and creating a weak point
- Missing or improperly lapped flashing above windows and doors
- Siding installed tight to the ground or a deck surface with no clearance, wicking moisture upward
- Caulk used to seal butt joints that should have been left to drain, trapping water behind the board
- No drainage gap on a wall that gets heavy, prolonged wind-driven rain exposure
- Moss and organic buildup left to sit against the siding surface for years without cleaning
Every one of these is preventable with correct installation practice. None of them are visible from the street, which is exactly why they tend to go unaddressed until there's a bigger problem behind the wall.
Why a Crew That Already Works in Custer Matters
Siding installation isn't just about following a spec sheet — it's about knowing how a specific location's weather actually behaves on a wall. A crew that regularly works Whatcom County properties near the water already knows which elevations take the worst of the wind-driven rain, how aggressively moss tends to establish itself on north-facing walls in this area, and where salt air does the most damage to fasteners and trim over time. That familiarity shapes decisions on the job — where to add extra flashing attention, which details to double-check — in ways that a generic installation approach doesn't.
It also means service after the job is done isn't a mystery. A local crew is easier to reach for a warranty question or a maintenance check than an installer working far outside their usual territory.
Caring for Hardie Siding After Installation
Correctly installed James Hardie siding is low-maintenance, but "low" isn't "none," especially in a climate that grows moss well:
- Rinse siding periodically to keep salt residue and organic buildup from accumulating, especially on shaded or north-facing walls
- Keep gutters clear so overflow doesn't run down the siding face repeatedly
- Trim back vegetation and landscaping that holds moisture against the wall or blocks airflow
- Watch for caulk failure at trim joints and have it addressed promptly rather than left to open up
- Have any impact damage inspected rather than assumed to be cosmetic only
If you're weighing a siding project in Custer, we're happy to take a look and put together a straightforward, no-pressure estimate — just fill out the form below.